![]()
![]()
Making U-shaped stairs inside a Foundation House with a basement.
This is
tricky, and is far easier to do if you start by building the stairs before you
do the rest of the house.
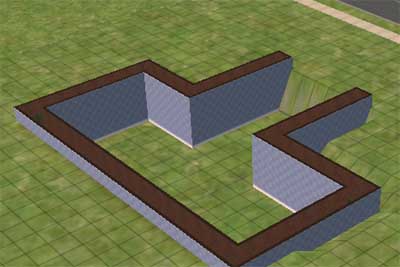
Build a basement the shape you want for your house. Cover the whole foundation
with floor tiles. It doesn't matter which ones for now.
Drop down to the lowest possible level and remove (by holding down Control and clicking on them) all but the outer border of foundation.
Remove a further few tiles at one edge to "open" the terrain.
Wallpaper the foundation with a wallpaper with a border that shows when you reach the bottom - see picture.
Lower the terrain in the middle until it reaches the level of the bottom of the wallpaper. This is the depth you want for your basement.
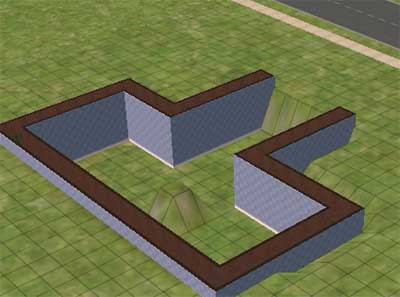
Raise a tile where the staircase will be by 8 clicks.
Go up a floor. You may find the game has disappeared most of your floor tiles. Put back the strip of foundation to close the basement again, and you will find if the ground is level that you can put the floor tiles back.
Now remove a few floor tiles from directly above where you raised the tile.
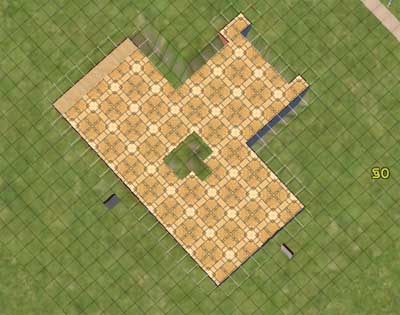
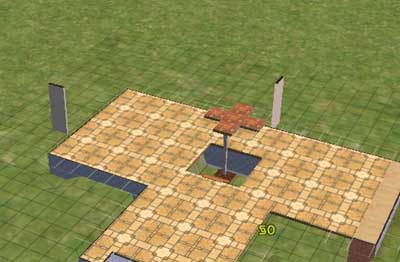
You should now be able to build a square of decking on top of the raised, levelled square. I find it helpful to use the "bird's eye view" for this.
It can be tricky to find exactly where you put the raised square when looking at the floor above - I use little bits of walls as markers, as can be seen in the picture above.
If even that does not work, you will have to "fool" the game into thinking that where you want to build foundation is open terrain - so you have to again remove what's left of your foundation. It can be put back as soon as you have placed your central decking tile.
Now fill back in as much as you can of the floor tile above the foundation. You will find that as you put in one tile the boundaries of another appear so that you can then add that one too.
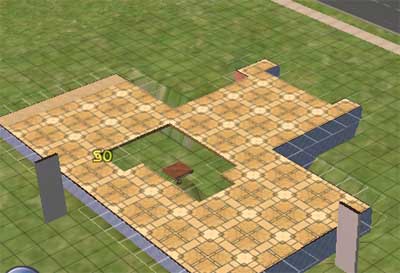
Drop a flight of Connecting Stairs from the front of the hole that is left to the top of your deck foundation tile (remember these need 4 tile-free squares, rather than 3). Put these in, pointing downward and to the back of the house, by placing the cursor on the tile that is to be the upper landing and dragging gently in the direction you wish the stairs to go.
Move down a floor and put another flight down to the cellar - if you want to use a cellar.
Now we are going to add a level. Build a column on top of the single decking tile. Go up a level and you can put a floor tile on top of the column. I have shown four tiles here but one will do.
Using the same principles, make a second piece of decking three tiles from the original, and drop a connecting stair to it from the first landing. Drop another stair to cellar floor and you have the first level of your U-shaped staircase.
Build up from this by adding columns and more stairs. In fact, this is the same principle as the spiral staircase.
If you do not want your house to have a foundation, once you have your first floor and the stairs up to it in position, then get rid of the basement by removing stairs down to it (on the lowest level of the house, hold down Control and click on the stairflight) and removing the single tiles of decking. Refill the foundation so the whole area is covered by foundation, in other words not hollow. Floor over and you should have a ground floor.
You cannot build on the tiles immediately next to the staircase unless you
use cheats which are beyond the scope of this tutorial. Consider the space a
stairwell. You can
place objects on these tiles, and these can be used to help disguise the drop.
Or fence it off for safety. It also helps to put matching floor tiles on the
basement.